

Recently one of the lights behind the instrument cluster burned out. Proper working dashboard lighting is an MOT requirement in the Netherlands. And because getting the cluster out of the dash is a bit of an ordeal, I decided to try and fix the lighting problem in a way it will last for much longer: by replacing light bulbs with LEDs. I searched endlessly on Google to find tips and tricks, but these turned out to be sporadic. Just some short mentions on fora.
So I decided to document my personal LED-puzzle in the hope I can help others with my lessons learned.
I will start with describing how to convert the dash. After that I will tell something about the switches in the center console.
DISCLAIMER: This is my personal journey. I’m not responsible If you try any off what I describe in your own car 😉
Table of contents
Click to skip to the desired part of this blog:
- Getting the dashboard out
- Converting the dash of a Renault 18 or Renault Fuego from lightbulbs to LED
- While the dashboard is out: service the speedometer and clock
- Converting the switches in the center console to LED
Getting the dashboard out
Getting the gauge unit out of the dashboard of a Renault 18 is a fiddly job. Here are the steps:
- Disconnect the negative terminal of the battery.
- Disassemble the casing around the steering column. To do this, first get out all screws. The casing has two parts. The small top part is attached to the bottom part with a ‘click’ system.
TIP: first take out the black screws on the four corners of the panel. Then unscrew the 3 screws under the steering column. I worked left to right, resulting in the weight of the panel hanging on the last screw in te right top corner. That one pulled through the plastic 🙁
- Unscrew the panel with the fuse box and pull it down
- Disconnect the 3 electrical connectors on the backside of the instrument cluster. There are two on the left side and one on the right side. Do this very gently! After some 40 years all the plastics tend to become brittle. At the same time they can be quite stuck and are in awkward places, so you have to find a balance in how much force you apply and where you do that.
- Disconnect the drive cable of the speedometer. Once again gently does it! On my older R18 I broke the connector 🙁 So on my roadworthy specimen I got it off using a large flat screwdriver to get some leverage between the speedo and the connector.
- Unscrew the 2 screws under the clock set. These are in the plastic flap that acts as a dust cover over the top of the steering column.
- Now comes the true fiddly part: getting the thing actually out. Put a large screwdriver between the top of the cluster and the dash. Than gently try to turn the clock set towards you. Once it it turned far enough you can push it up a bit. Than pull it outwards and under an angle negotiate it towards the right between the dash and the steering wheel.
- Voila! You’re now holding the instrument cluster in your hands. The job of converting it can begin!

TIP: in later models of the Renault 18 they made the electrics much tidier than in the earlier models. In my 1984 R18 you can pull the connector from the right side over the steering column to the left. This makes it possible to connect the instrument cluster when it’s not in place. Very handy when testing! In my 1982 model everything is tangled and tied together, making this impossible.


Converting the dash of a Renault 18 or Renault Fuego from lightbulbs to LED
After a search on the internet for LEDs I was completely puzzled by all the types and sized of LEDs . I found out that the lightbulbs are in T5 fittings. But even that knowledge didn’t help much. So I found a guy owning Carledplaza, near the place where I live. After exchanging some WhatsApp messages I took the cluster to his workshop and he provided me with LEDs of several types and colors. So I could experiment with what works best.
TIP: Light bulbs don’t have a positive and negative pin. Most LEDs do. So it is useful to have a 12 Volt power supply at hand to test. This doesn’t have to be something fancy. I my case I converted a cheap 12 Volt DC power supply by cutting the plug and replace it with 2 wires with crocodile clamps soldered to the ends. Red for + and Black for -.
Another TIP: When you test the LEDs, mark the + with a permanent marker, so you know which side is which 🙂

Puzzling connections
With positive and negative connections on the LEDs you can’t just go about replacing the bulbs with LEDs. The LED has to be in the right way around.
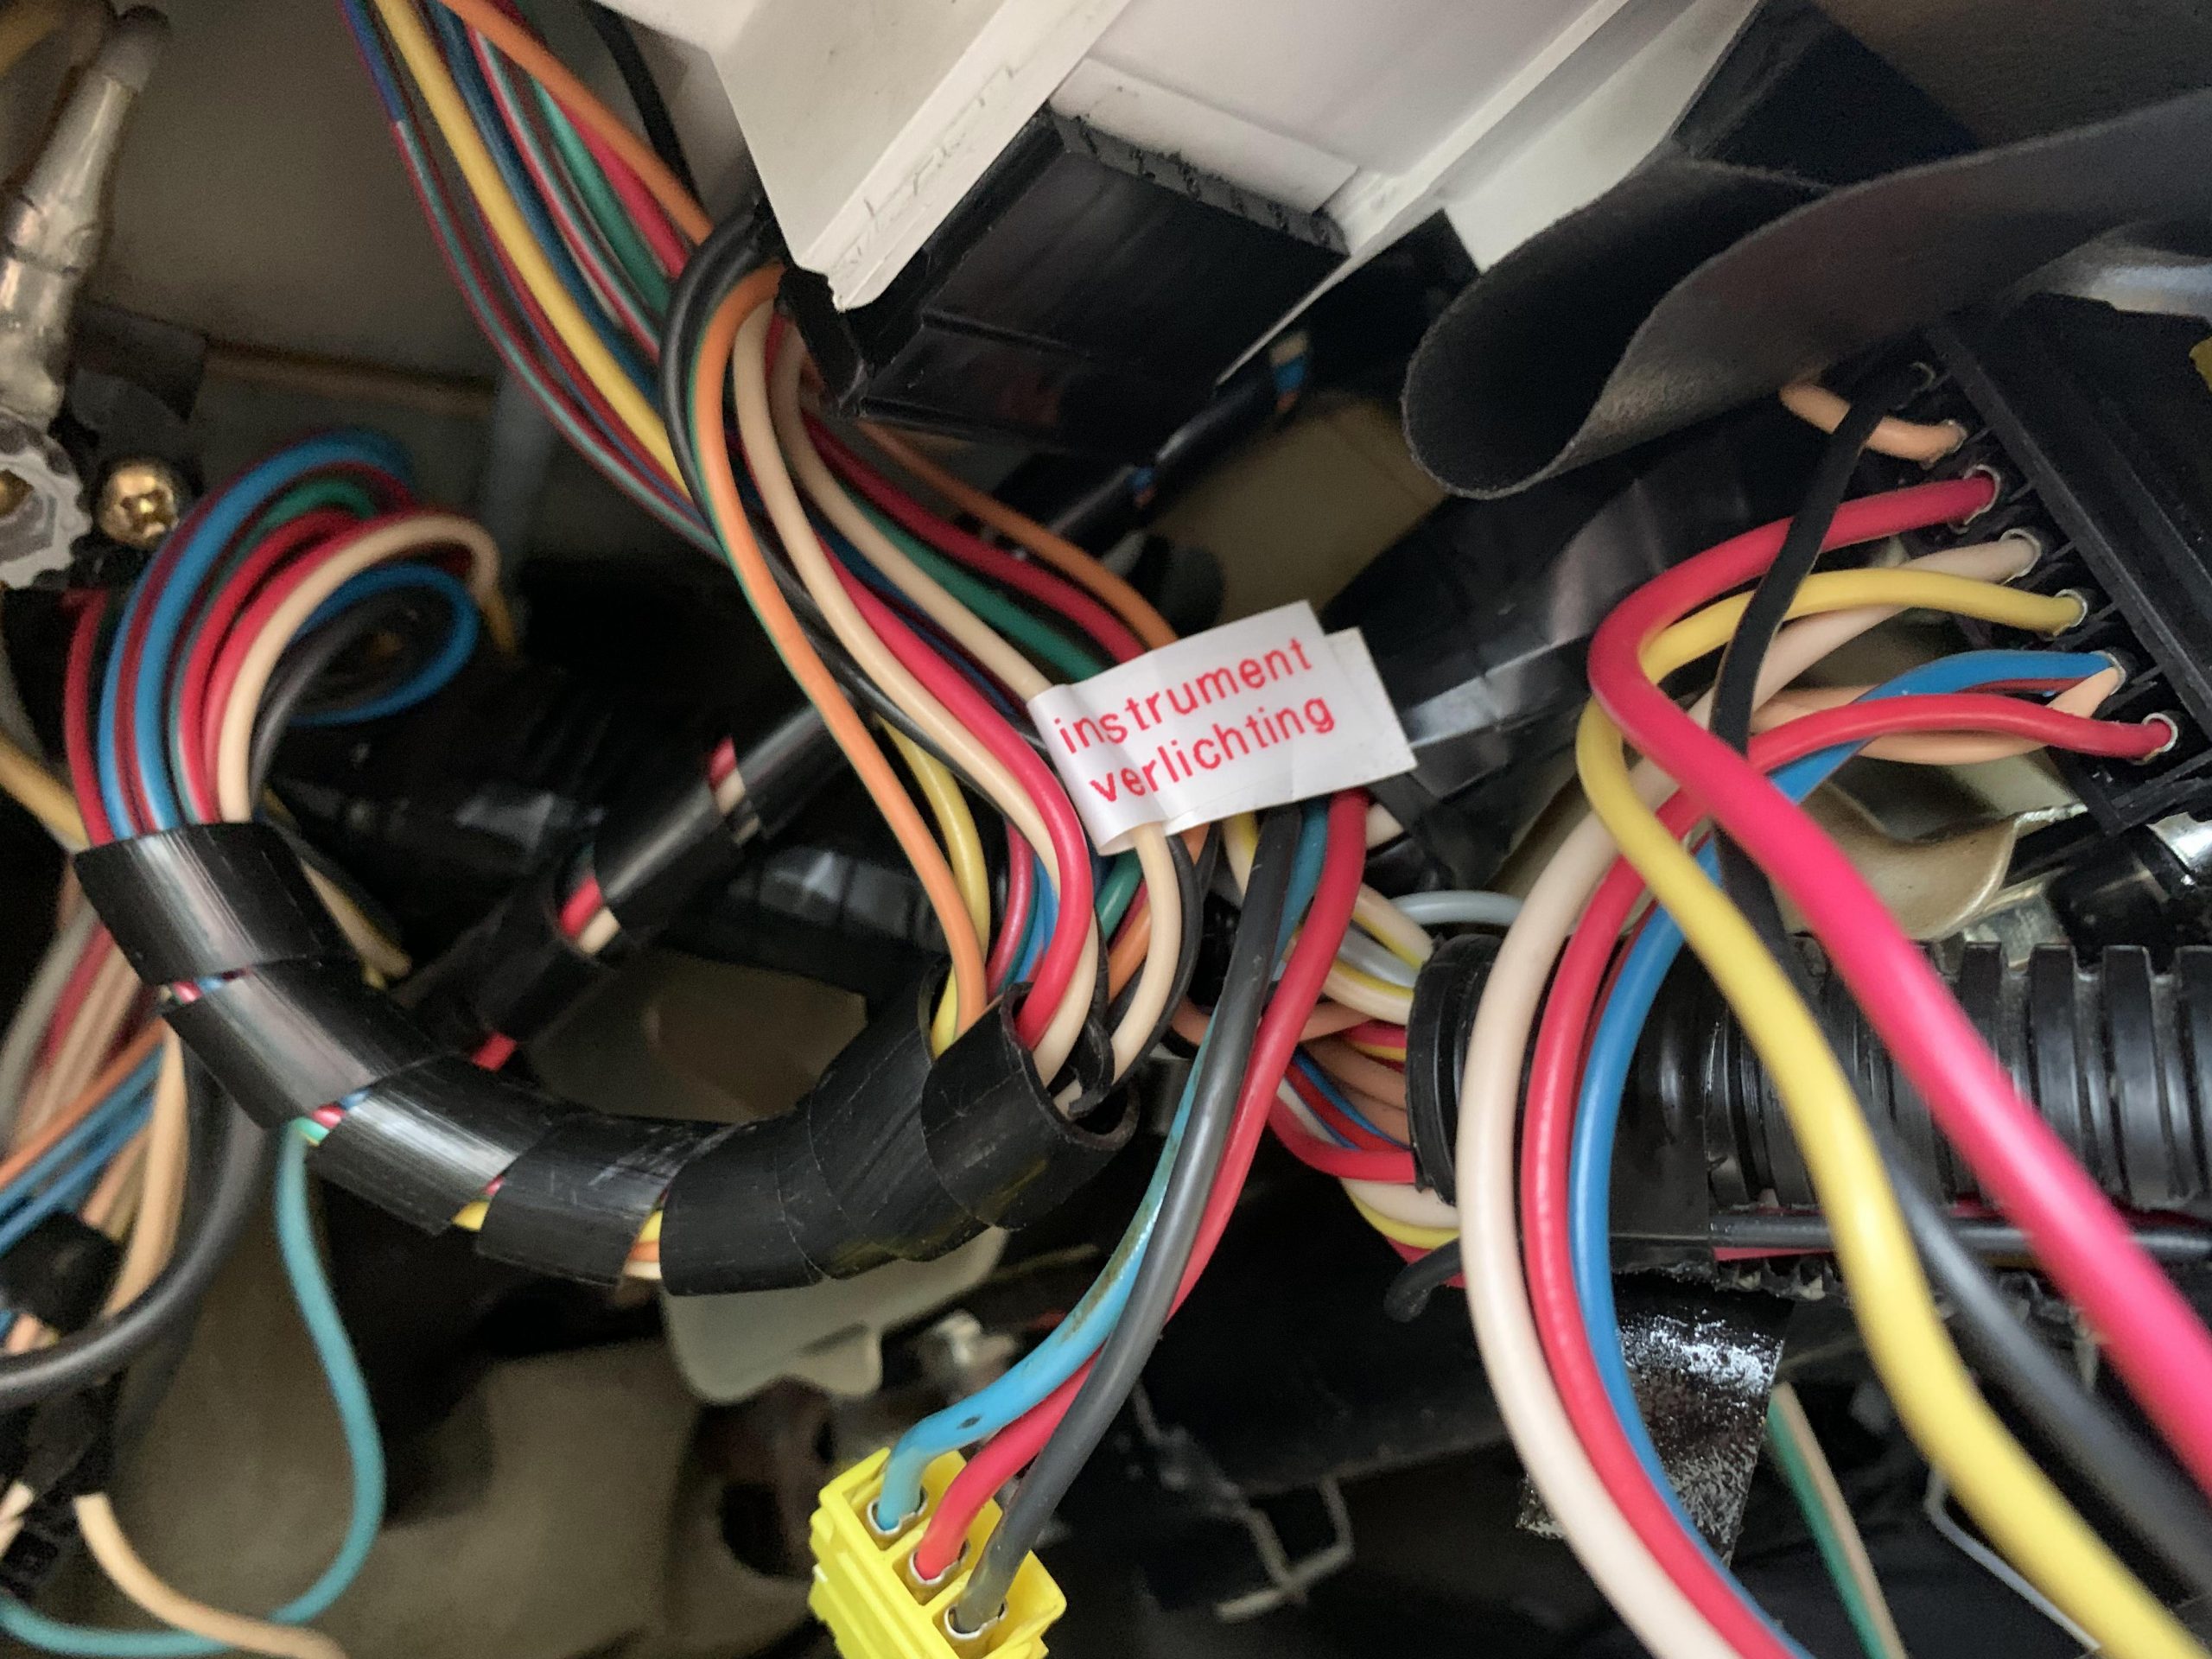
In the workshop manual of the R18 there is a diagram of the printed circuit board. But this is only helpful when you own a pre 1981 model. For my 1984 R18 it isn’t much use. On both sides the connectors have grown connections over the years. And based on the diagram it seems that the older models switched everything on the negative side, with the positive side permanently connected. In my R18 it turned out that they switched most (but not all) the other way around. I found that out after installing the whole damn thing only to discover that just 2 LEDs lid up.

TIP: I could have prevented this mixup by looking at the connectors on the dash: black wires = negative.
Trial and error
After this the job began of replacing and testing the LEDs one by one.
- Persuading the light bulb to get out of the socket. Gently pulling it with some pliers worked best in most cases. Don’t squeeze too hard because this off coarse will break the glass. I managed to get all out in one piece.
- Put the LED in and find out which side is + and -.
- Finding out which way the socked has to be screwed in to the dash to get it to work. I used the crocodile clamps on the connector terminals to test this. I also wrote down which terminal is which lamp/LED for later reference.
- When it lights up, get on to the next.

TIP: the owner of Autoledplaza told me you can best use coloured LEDs for the warning lights. Because white LEDs are bright white, the colour of the indication can change. As it turns out the colour of the green, red and blue lenses are effected very little by white LEDs. The tint just gets a little lighter. Orange however turns to yellow when you put a white LED behind it.
Which type of LED works best in which position
I got 3 types of LEDs:
- Is shorter than the standard LED and doesn’t have a + and – side. I believe these are Canbus LEDs. They are used in in cars where replacing bulbs with LEDs causes errors in the car’s systems. It fits in a T5 socket and in the switches in the center console.
- Is the cheapest LED. It’s slightly taller. It has a + and – side. When putting it in a T5 socket make sure the terminal is bended to the side properly. Otherwise it might not make a connection
- comes with it’s own socket. This one also has a + and – terminal. I believe the socket is T4,8. But it fits in the dash properly.

I tried several options to see what works best in the Renault 18 dashboard. To understand what I learned you need to know what the dashboard looks like on the inside. See the image below.

Behind the coloured warning light lenses on the front there are white boxes with the sockets in the back. I found out that LED type 3 give the most even light. The light source is completely in the back. The light is reflected off the sides of the white boxes. Because the type 3 LEDs are flat and completely in the back, the reflections off the sides results in a nice even colouring of the complete lens. Type 1 and 2 work, but they project a round light shape on the lens.
Unfortunately I didn’t buy coloured LEDs type 3 and only had a limited number. So I used these for the most lid warning lights: low beam, indicators, hand break and oil pressure.


For the back lighting of the gauges LEDs type 1 give the best result. I first tried type 3. But they lid the back of the dials more locally. Because type 1 LEDs give more light to the side they give a more even light.
The light of the LEDs give the dashboard a more blueish back lighting. This has to do with the material the instruments are made of and the brighter and more whiter light of the LEDS. The base material of the instruments is blue plexiglass . The white light reflects off/shines through these blue surfaces. The result is brighter a more blueish light.


WARNING: do NOT REPLACE the alternator warning light with an LED. I was warned that this light bulb is part of the circuit. Replacing it will alter the circuit stopping it from working properly. I just put in a fresh light bulb here.
By the way: I also didn’t replace several other warning lights, like the low fuel and break pad light. In my cars the only time they were ever lit, was when I tested the terminals.
TIP: one or two extra sockets might come in handy. The socket of the low beam warning light had become toast from the heat of the bulb.

Handle the printed circuit board with tender loving care
The printed circuit board is old and clearly not made to survive 40 years. On mine the copper printed wiring has become detached on several places. Especially at the terminals for the connector this can be an issue. They might fold and not connect, or worse, create a short circuit. I gently glued some of them back using just a little drop of super glue, applied with the tip of a pin. Make sure no glue comes on the connecting side.

Does the dimmer still work? Well, yes and no…
The most asked question I got so far: does the dimmer still work? The LED lighting is brighter than the old light bulbs. I found that the dimer does take off the edge. But the effect is marginal.
I am looking for a solution to dim the LEDs better. This might be a separate project in the future. But I’ve prepared for this project by labeling the wire that supplies the back lighting of the dashboard with + 12 Volts
While the dashboard is out: service the speedometer and clock
Servicing the speedometer
I own a 1982 and 1984 Renault 18 GTL. On both cars I have removed the instrument cluster several times. And on both cars I found out the hard way that it is wise to service the speedometer. On my 1982 R18 the speedometer indicated way too low after putting the cluster back for the first time. On my 1984 R18, the needle indicated correctly but dropped back to zero very slowly when speed decreased. I think this is due to several decades of dust in the mechanism.
The speedometer itself is a nice piece of simplicity and ingenuity. The cable from the gearbox drives a magnet, making it spin inside of a metal cup that is attached to a thin spiral spring and the dial you see on your dashboard. The harder the magnet spins, the harder it pulls on the metal cup, making it turn against the force of the spring.

Gently take the mechanism apart. Apply some thin oil (in Ducth we call it ‘naaimachine olie’) on all axles and moving parts. Than put the whole lot back together and place the instrument back in the cluster. Job done!
Fixing the clock
A Renault 18 or Fuego with a working clock is a rare sight! In most cases the hands of the clock crack at the rings that attach them to the axles. Just put a tiny drop of superglue on the rings using a pin

In my 1984 R18 I performed this fix a year ago. But over the last months it just stopped working all together. The seconds hand just twitched a little. So I did a ‘Frankenclock’ and replaced it with the working and fixed clock of my 1982 R18.

Converting the switches in the center console to LED
Especially in the switches I think LEDs can be a useful substitute. Because of the tight spots where the bulbs are and their black surroundings, they get hotter and burn trough faster than all the other bulbs. In my oldest R18 the heat of the bulb eventualy even burned through the plastic of the switch!
Getting the panel with the switches out, disconnecting the switches and pulling them out is pretty straight forward. Being a GTL model, mine has just 2 switches: rear window heating and hazard lights.
You can pull the top cap off by gently forcing a small screwdriver behind it and pulling it over the stubs on the sides.

WARNING: Be careful with the hazard lights switch. Pull it apart above a table or flat surface. It can contain a spring. In the switch from my 1982 R18 this acted like a jack in the box, spilling all it’s guts in front of me. If you do this on the street or in the car, you’re likely to spend some time searching for parts 😉
In my 1984 model the design of the switch has been improved.


Pull out the bulb out with pliers. Gently push in the LED with pliers. I used the shorter type 1 Canbus LEDs in the switches. They fit nicely, + and – is no issue and they provide excellent lighting of the switches. But be aware of the connections inside of the switch!
WARNING: these LEDs have 2 connections on both sides. You have to put them in 90 degrees turned (this is not ideal, but it’s possible thanks to the way the clamps are constructed), or remove a connection on each side of the LEDs. If you don’t, you’ll create a short circuit and blow a fuse. I did!
Test the light in the switches with your 12 Volt power supply before you put them back in the car.


What do they look like while driving?
Well I actually don’t know that yet. When I wanted to take the car for a test drive the engine started to spill oil. Probably a leaky front crankshaft oil seal. So I have to sort that out first.
